Securing AWS API Gateway using AWS Cognito OAuth2 scopes
To Nha Notes | Oct. 17, 2024, 3:04 p.m.
Step 1: Create AWS Cognito user pool and setup a OAuth application
- Login to AWS Management console and navigate to Cognito service
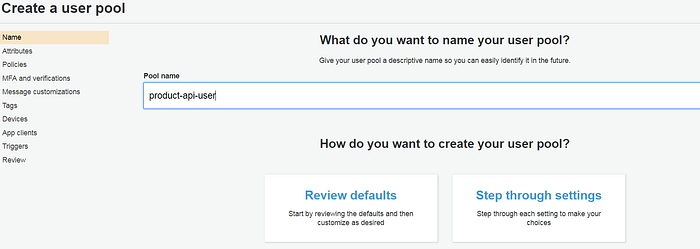
- Select “Manage your user pools” and click “Create a user pool”
- Enter a pool name and select “Review defaults”. Then select “Create pool”.
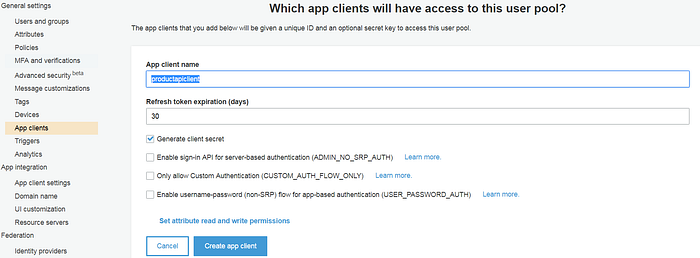
- Navigate to “General Settings > App clients” and select “Add an app client”
- Enter a “App client name” and select “Generate client secret” checkbox. Then “Create app client”. Note down the “App client id” and “App client secret” values displayed in next page.
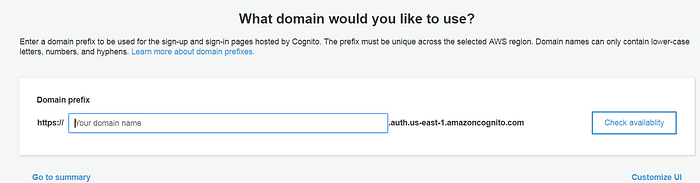
- Go to “Domain name” and enter your own domain name. It can be any name like test, test123 etc. You can check if the domain is available or not. Let us assume that domain name is api-product. So, the URL would be https://api-product.auth.us-east-1.amazoncognito.com
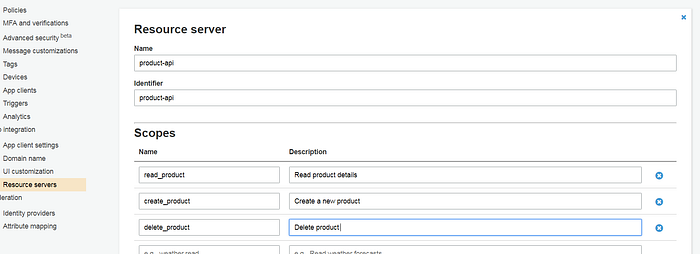
- Go to “Resource Servers” and “Add a resource server”
- Enter “Name” and “Identifier”. It can be any value. Also, add 3 scopes and save changes.
- read_product
- create_product
- delete_product
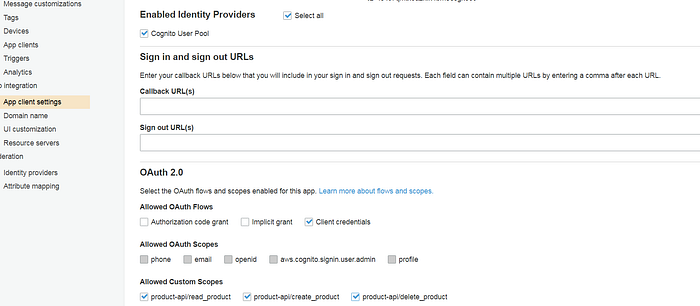
- Go to “App client settings” and you should see the configuration page for new App client. For “Enabled Identity providers” , select “Cognito User pool” checkbox. Then select “Client credentials” checkbox for “Allowed OAuth flows”. Select all the scopes for “Allowed custom scopes” and save changes. If certain clients should have only “read_product” scope, then select only that checkbox.
- Now, we have successfully setup a OAuth2 agent in Cognito. Below CURL command should return an access token
//Replace app client id and secret accordingly. Also, the URL will change if you had selected a different domain namecurl -X POST --user <app client id>:<app client secret> 'https://api-product.auth.us-east-1.amazoncognito.com/oauth2/token?grant_type=client_credentials' -H 'Content-Type: application/x-www-form-urlencoded'{"access_token":"eyJraWQiOiJFTUlrM3NBSjhUQ0s3a0l4UTdzQ1dJTmEyeW5OTW93bzcxVDlYU2VoN3pjPSIsImFsZyI6IlJTMjU2In0.eyJzdWIiOiI0czRjN3FtdGtvYTJrZms0Ym0wZXNnazMzYyIsInRva2VuX3VzZSI6ImFjY2VzcyIsInNjb3BlIjoicHJvZHVjdC1hcGlcL2RlbGV0ZV9wcm9kdWN0IHByb2R1Y3QtYXBpXC9yZWFkX3Byb2R1Y3QgcHJvZHVjdC1hcGlcL2NyZWF0ZV9wcm9kdWN0IiwiYXV0aF90aW1lIjoxNTIzOTE2Nzc1LCJpc3MiOiJodHRwczpcL1wvY29nbml0by1pZHAudXMtZWFzdC0xLmFtYXpvbmF3cy5jb21cL3VzLWVhc3QtMV8yRVhzSENwR3QiLCJleHAiOjE1MjM5MjAzNzUsImlhdCI6MTUyMzkxNjc3NSwidmVyc2lvbiI6MiwianRpIjoiZDhlZTkwMGItOTFhZC00ZjVmLTk0YmItN2Q2NTcwYTNlMWQzIiwiY2xpZW50X2lkIjoiNHM0YzdxbXRrb2Eya2ZrNGJtMGVzZ2szM2MifQ.bMup2dXwteG8-lVTQcoO-lBuaPLYc7DONNAVW78peOi3KZzM9T6ZmKLKkjW8WIfk4Cq2ZNMrDchWvZoscZ848Kvd6M7aYUQtjfVRHyWuIVDCIUhyIUMmVJUmo9mh78Qq13u5Rsvbs5V1nezRRB0qIqr4SNGUsfV-lfAWXVYZtZYPU7xiVjjycAffDCgqjq91WfpX2AsvooaqiYgYKQ-5bzPj41kWf3ogLl18DOV4w5bHWhD8BjWHmA8H4R2O_039ecwcv0itz4S2-YlqzIX9NNtdL8DT7Wf8h8y-rJrUYj0iE1FyEisg9L1FoLpaMlR7Mf8ksdne8J05kx7vp7YwPQ","expires_in":3600,"token_type":"Bearer"}
- You can copy and paste the access_token value in https://jwt.io/ website. You should see all the 3 scopes in the token by default — “scope”: “product-api/delete_product product-api/read_product product-api/create_product”
- Cognito follows the OAuth2 specification. You can try passing a specific scope in the CURL command and check the token.
//access_token returned with below CURL command should return only product-api/delete_product scopecurl -X POST --user <app client id>:<app client secret> 'https://api-product.auth.us-east-1.amazoncognito.com/oauth2/token?grant_type=client_credentials&scope=product-api/delete_product' -H 'Content-Type: application/x-www-form-urlencoded'
Step 2: Setup a sample micro service application in AWS using API Gateway and Lambda
It is pretty easy to setup the sample micro service application.
- Login to AWS Management console and navigate to AWS Lambda service.
- Create a new function. In this screen, select Blueprints and search for microservice
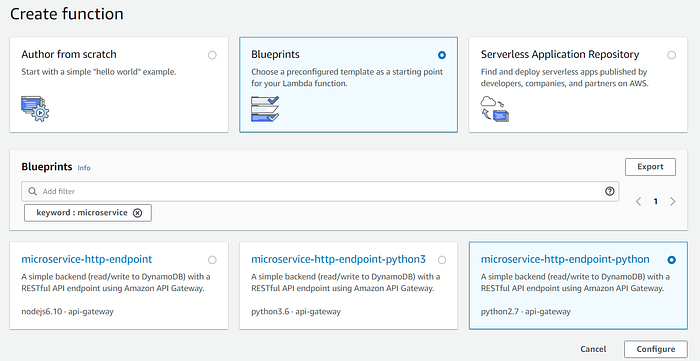
- Select microservice-http-endpoint-python and click configure.
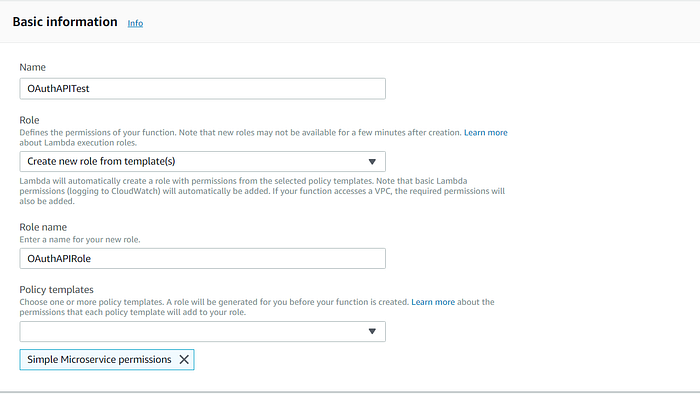
- In Basic Information screen, enter a Name for this function, Role name and leave other fields as default. For this example, name it as “OAuthAPITest”
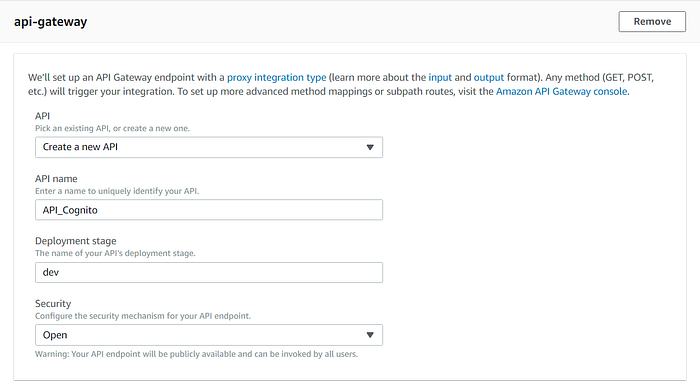
- In api-gateway section, select “Create a new API”, provide a API name, Deployment stage and select “Open” for Security.
- scroll down and click “Create function”. This should automatically create Lambda function, corresponding API Gateway endpoints.
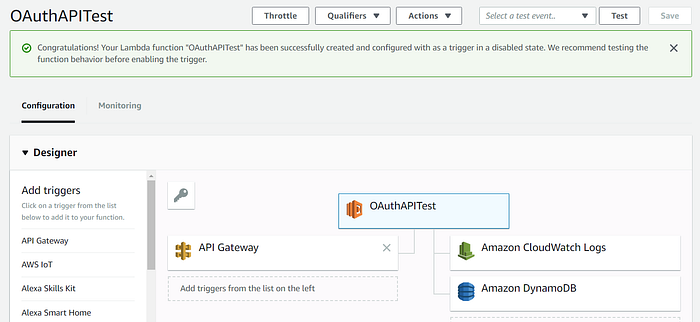
Lambda Function
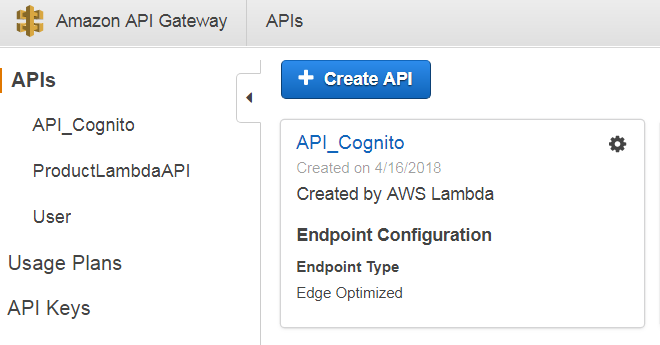
API Gateway
- Click “API_Cognito” link and select “Stages” in left navigation bar. Select “dev” stage and copy the “Invoke URL” value.
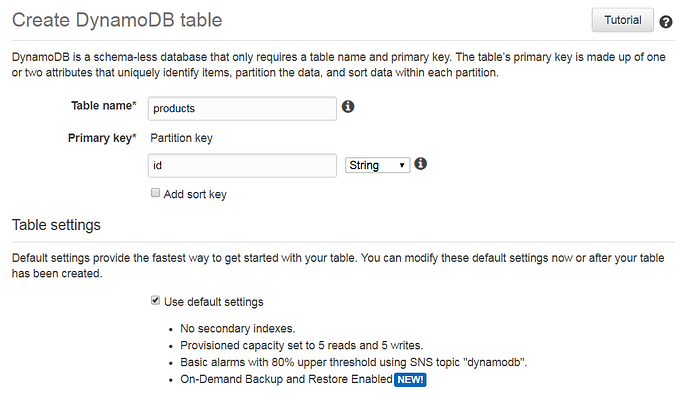
- Since this service requires a Dynamo DB instance, navigate to DynamoDB service and create a new table called “products” with primary key “id”.
- Open a REST client like postman or terminal and create 2 records in dynamo DB table using below CURL command
//Replace the <Invoke URL> value of API Gatewaycurl -X POST 'https://<Invoke URL>/OAuthAPITest?TableName=products' -H 'Content-Type: application/json' -d '{"TableName": "products","Item": {"product": {"S": "android"},"id": {"S": "1"}}}'curl -X POST 'https://<Invoke URL>/OAuthAPITest?TableName=products' -H 'Content-Type: application/json' -d '{"TableName": "products","Item": {"product": {"S": "apple"},"id": {"S": "2"}}}'
- Execute below CURL command to test GET
curl -X GET 'https://<Invoke URL>/OAuthAPITest?TableName=products' -H 'Content-Type: application/json'
- Execute below CURL command to test DELETE
//Change the "id" value accordingly to delete both productscurl -X DELETE 'https://<Invoke URL>/OAuthAPITest?TableName=products' -H 'Content-Type: application/json' -d '{"TableName": "products","Key": {"id":{"S": "1"}}}'
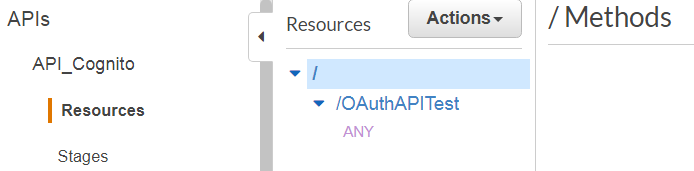
- Let us modify the API methods. Navigate to “Resources” in API_Cognito configuration. You will see only one method “ANY” below “/OAuthAPITest” which means it accepts all HTTP methods.
- Select “ANY” and then “Actions > Delete Method”
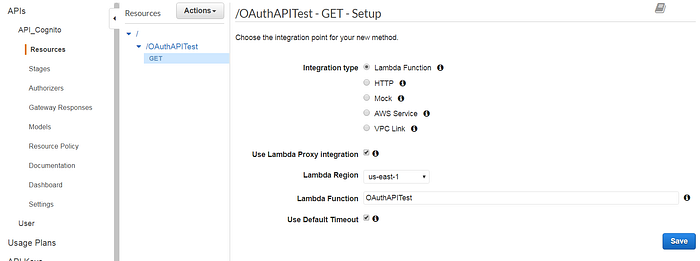
- Select “/OAuthAPITest” and then “Actions > Create Method”. Select “GET” and click the tick mark to add it. In the Setup screen, select “Use Lambda Proxy Integration” checkbox and enter “OAuthAPITest” for Lambda Function. On clicking “Save”, it will show a prompt for permissions and click OK.
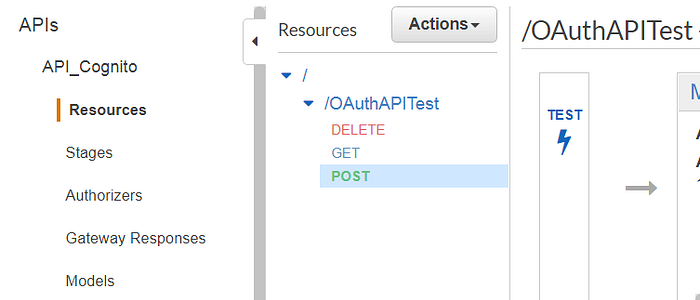
- This should create the GET method. Similarly, create 2 more methods “POST” and “DELETE” with same configuration. You should see 3 methods after this.
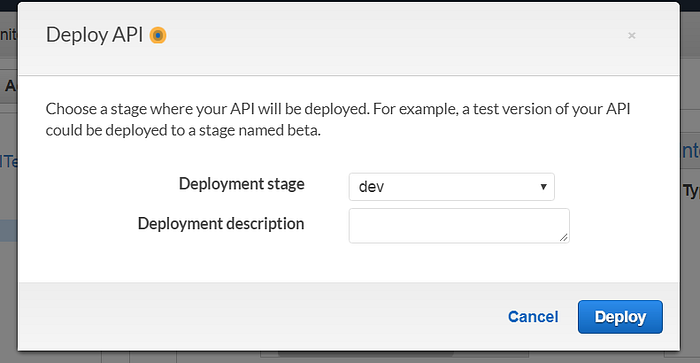
- Now, select “Actions > Deploy API” and select “dev” for “Deployment Stage”. Click “Deploy”.
- Wait for couple of minutes since it will take sometime to deploy the changes. Then test the POST, GET and DELETE CURL commands again. It should work.
Step 3: Configure Cognito Authorizer for API Gateway
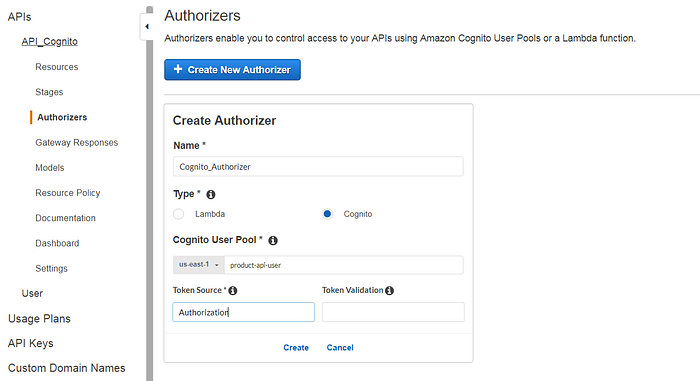
- Go to “Amazon API Gateway > API_Cognito > Authorizers” and “Create new Authorizer”. Enter a Name and select user pool which was created in Step 1. Also, enter “Token Source” as “Authorization” header.
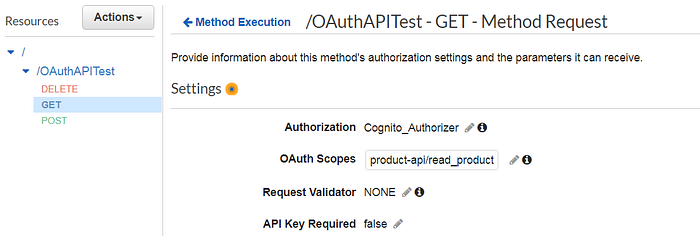
- Go to “Resources” and select “GET” method. Select “Method Request” configuration on right pane.
- Select “Cognito_Authorizer” in “Authorization” drop-down. That should automatically add a new field “OAuth Scopes”. Enter “product-api/read_product” scope and save using the tick mark.
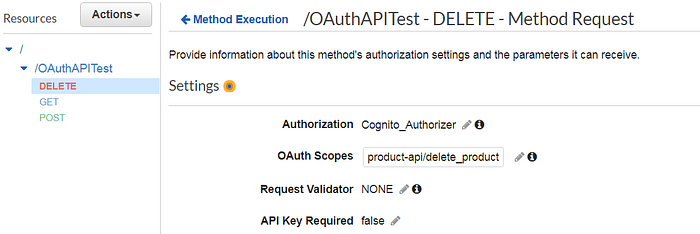
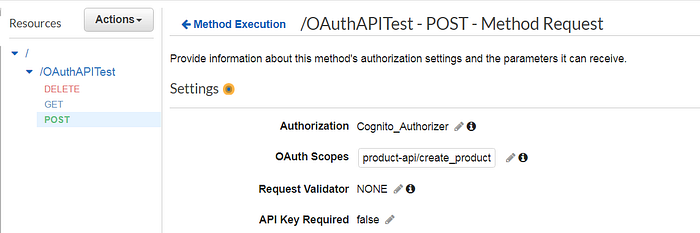
- Similarly, map DELETE method to “product-api/delete_product” and POST method to “product-api/create_product”
- Select “Actions > Deploy API” and select “Deployment stage” as “dev”. This should deploy the latest changes in these APIs.
Step 4: Testing
Now, let us test this API using the access_token obtained from Cognito
- Get access_token from Cognito
//Change app client id, secret and URL accordinglycurl -X POST --user <app client id>:<app client secret> 'https://api-product.auth.us-east-1.amazoncognito.com/oauth2/token?grant_type=client_credentials' -H 'Content-Type: application/x-www-form-urlencoded'
- If you try the previous CURL POST request to create a product in DynamoDB, it won’t work because API Gateway expects a Authorization header with access_token. Also, the token should contain the scope product-api/create_product
//Replace the <Invoke URL> and access_token accordingly. If there is any issue with the token, API Gateway will return 401 error.curl -X POST 'https://<Invoke URL>/OAuthAPITest?TableName=products' -H 'Content-Type: application/json' -H 'Authorization:<access_token>' -d '{"TableName": "products","Item": {"product": {"S": "apple"},"id": {"S": "2"}}}'
- Execute the below CURL command to get the product details
curl -X GET 'https://<Invoke URL>/OAuthAPITest?TableName=products' -H 'Content-Type: application/json' -H 'Authorization:<access_token>'
- Execute the below CURL command to delete the product details
curl -X DELETE 'https://<Invoke URL>/OAuthAPITest?TableName=products' -H 'Content-Type: application/json' -H 'Authorization:<access_token>' -d '{"TableName": "products","Key": { "id":{"S": "1"}}}'
- To make sure scope based Authorization is working fine, make /token API call with a specific scope, say scope=product-api/create_product. If this access_token is used for GET / DELETE API calls, API Gateway will return “Unauthorized” error.
curl -X POST --user <app client id>:<app client secret> 'https://api-product.auth.us-east-1.amazoncognito.com/oauth2/token?grant_type=client_credentials&scope=product-api/create_product' -H 'Content-Type: application/x-www-form-urlencoded'
This concludes the setup. By creating multiple clients with different scopes, API access can be controlled per client application. Please note that in this use case, we used client_credentials grant which is not user specific, but application specific. To make it user specific, we have to use OpenID Connect which will be a totally different configuration. Please refer this blog on how to implement the same use case using OpenID Connect.
There are multiple ways to control access to AWS services. AWS Cognito’s Role-Based Access Control can be used to control access to not just API Gateway, but to all AWS services. Refer this blog.
References
https://repost.aws/knowledge-center/api-gateway-cognito-user-pool-authorizer